Documentation
Install the Zoom App from the Go High Level Agency Marketplace
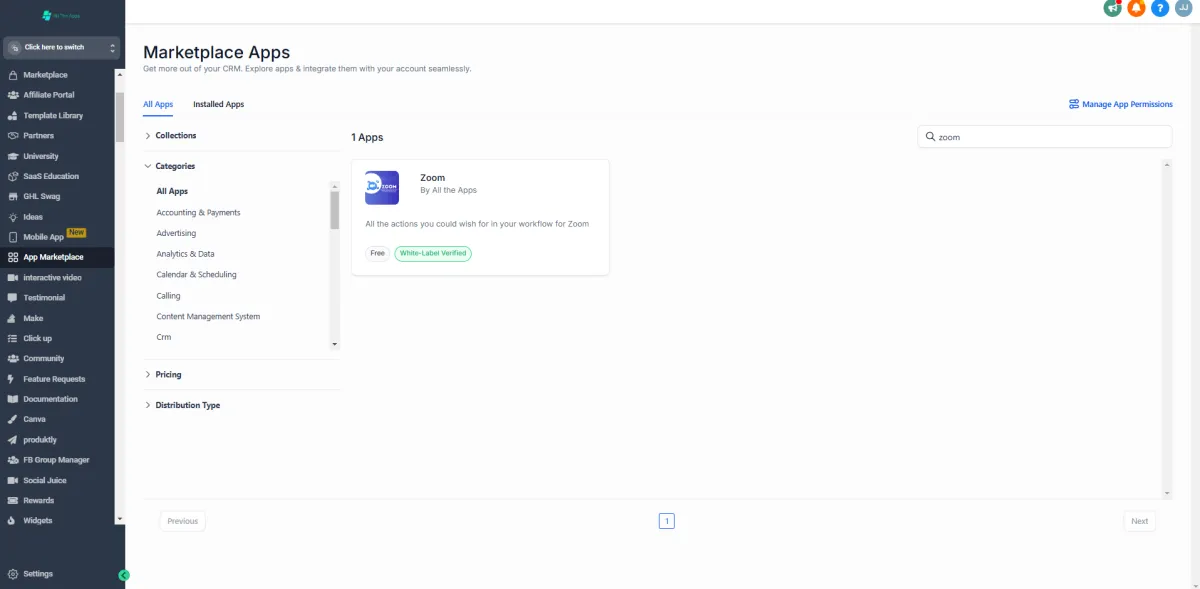
Start by logging into the Go High Level Agency platform. On the left side of the dashboard, find App Marketplace and click on that. In the search bar, type Zoom and select it from the results. Follow the on-screen instructions to complete the installation process. This step ensures that the Zoom app is integrated into your platform for seamless use.
Zoom in Sub-Accounts
Once the Zoom app is installed, Go to one of your sub-accounts where you wish to use it.
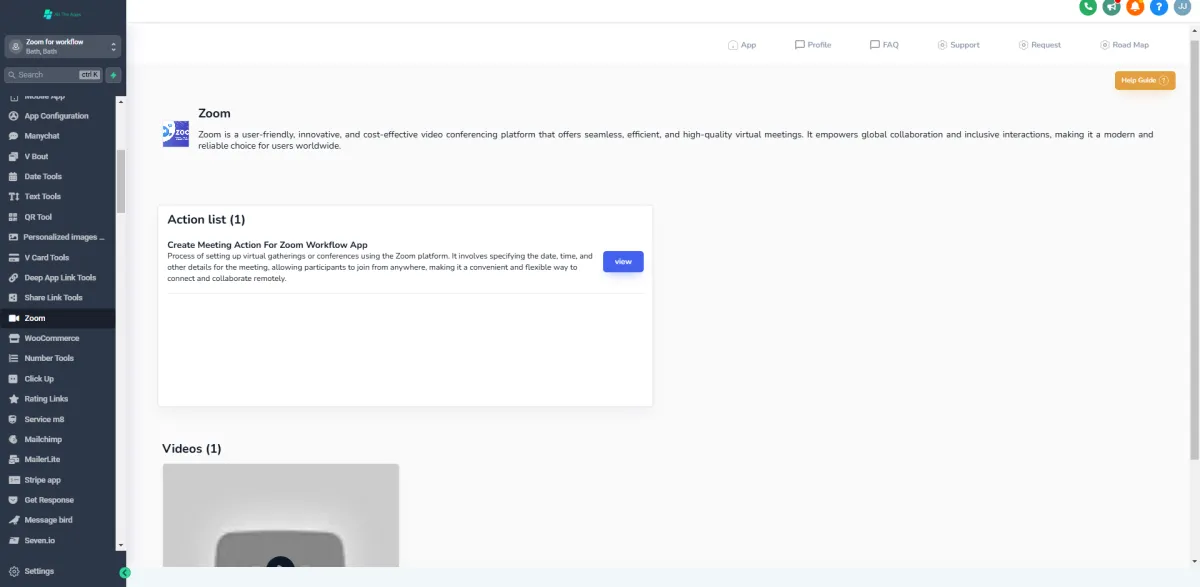
On the left navigation bar of the sub-account, their is Zoom button click on that.
Connect Zoom to Your Sub-Account
Once in the Zoom section, locate the App button on the top navigation bar and click on it. This will prompt you to connect Zoom to your sub-account. Follow the connection process to complete the integration and enable seamless communication within the sub-account.

Permissions From the Zoom's Marketplace
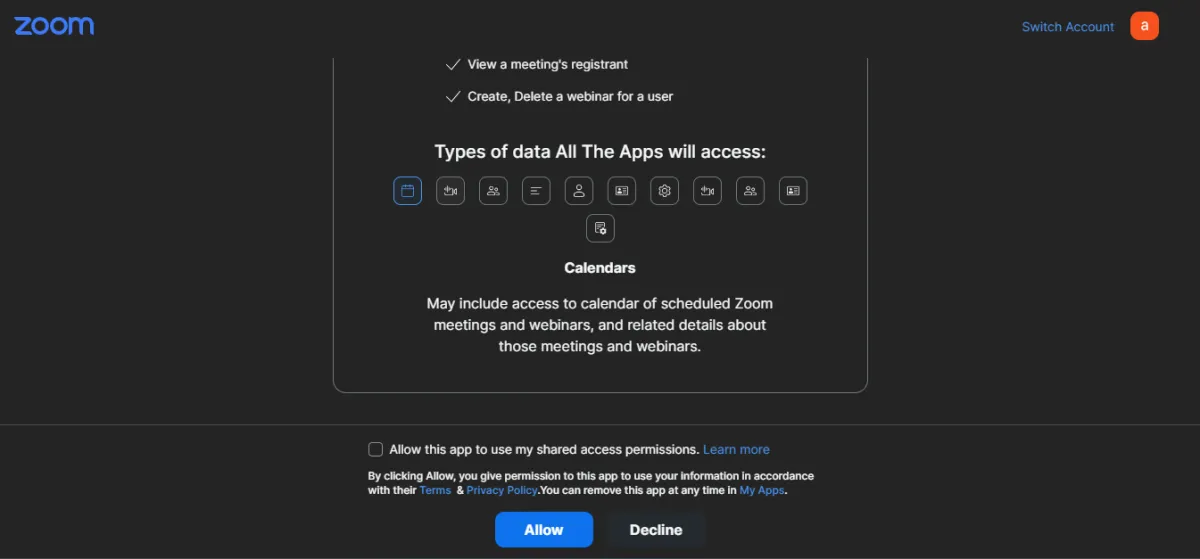
Once You have clicked the Connect Button it will redirect you to Zoom's Marketplace and Now you have to login with your account and then you need to give permissions to the Marketplace. Here you go!! The app is installed and you can now use it.
Where you can make Workflow
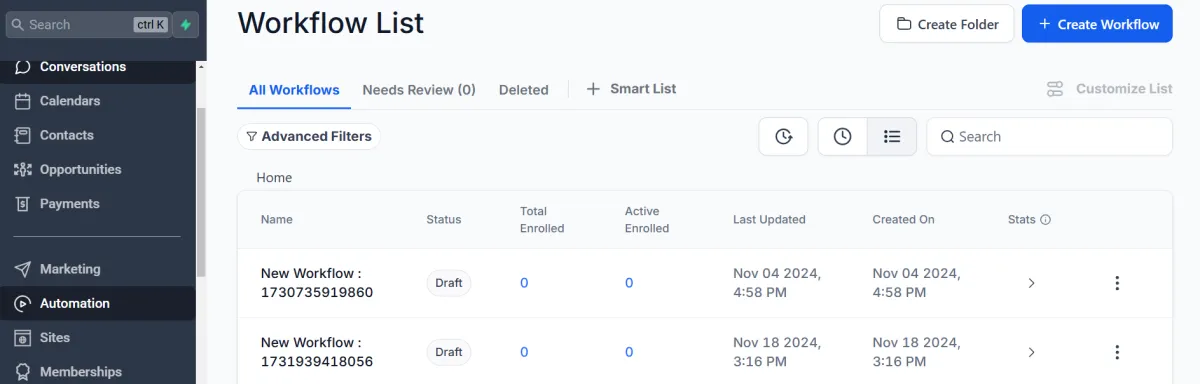
Go to the sub-account on which you wanna create the workflow. On the left hand nav-bar go to the Automation in the image you can see that.
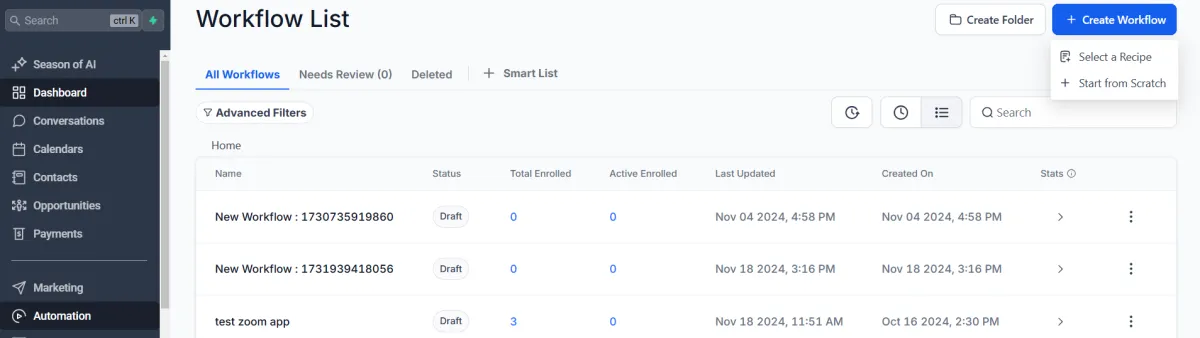
Automation - Workflow
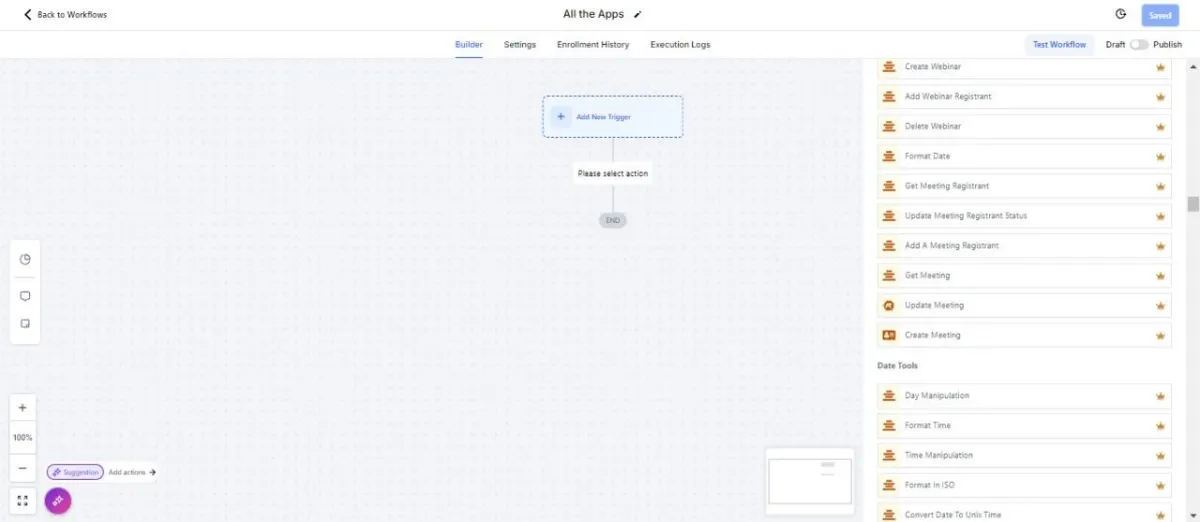
When you click on the Automation on left hand nav-bar a page will appear. Then on the right hand top side you will see create workflow button click on that a dropdown will appear. Then click on the start from scratch.
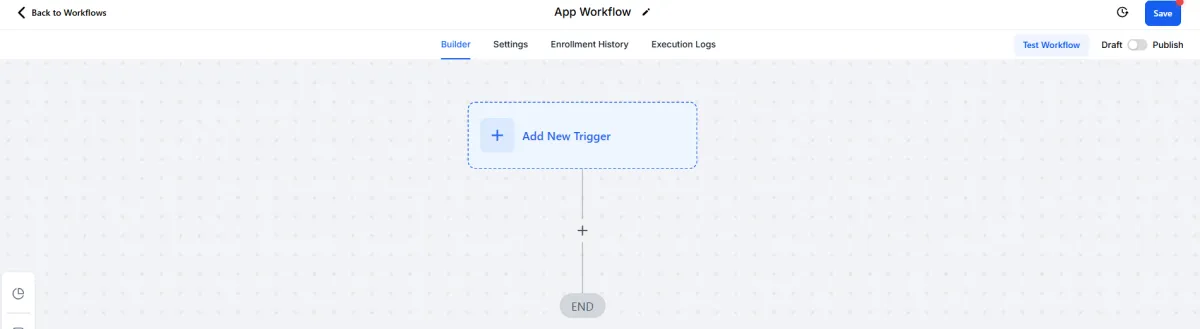
Workflow View
So when you click on the Start from scratch button on top left hand side a page will appear as you can see in the images. Click on the Plus button on bottom of the Add new Trigger in the center of the page for the actions of your app.
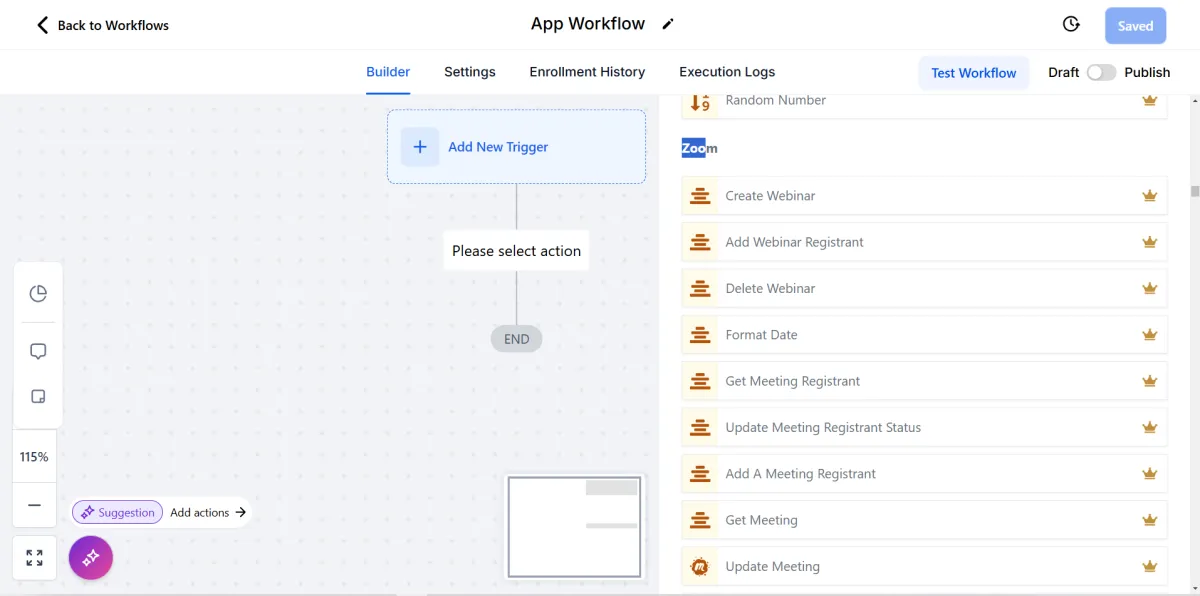
App Action's
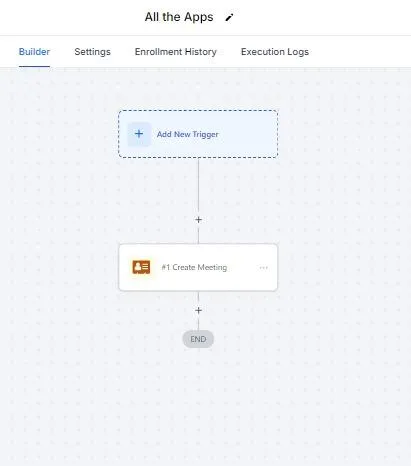
When you click on the plus button a slider will appear on the left hand side that's the all Triger. Scroll down and you will find all the trigger related to your app. Click on the create meeting.
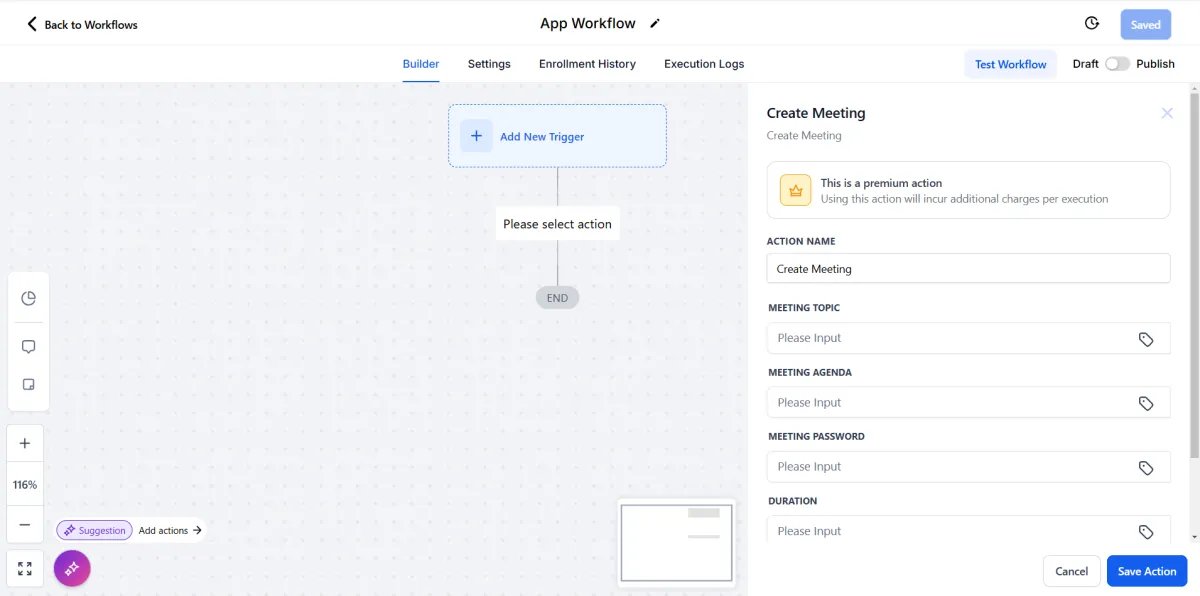
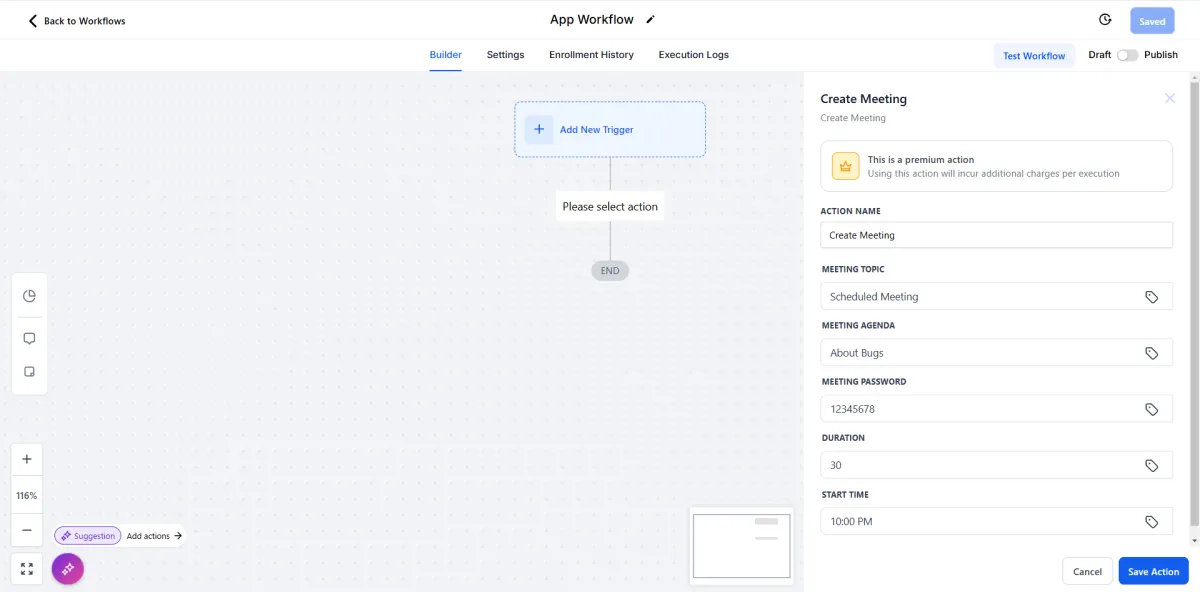
Create Meeting
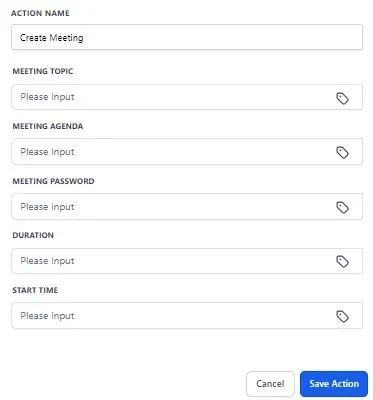
When you click on the create meeting, a side nav-bar will appear as shown in the image.
After that fill out the fields which is required on that and hit on the save action button on the bottom right side.
Don't forget to click on the saved button on top right side.

Test your Workflow
After all the procedure done You have to check that your workflow is working fine or not. For that click on the Test Workflow Button on top right side. From left hand side a slider will appear. Their is a field name select contacts click on the field your contact list will appear as a drop down. Select one of the contact from that list and hit the button Run Test on bottom of that field.
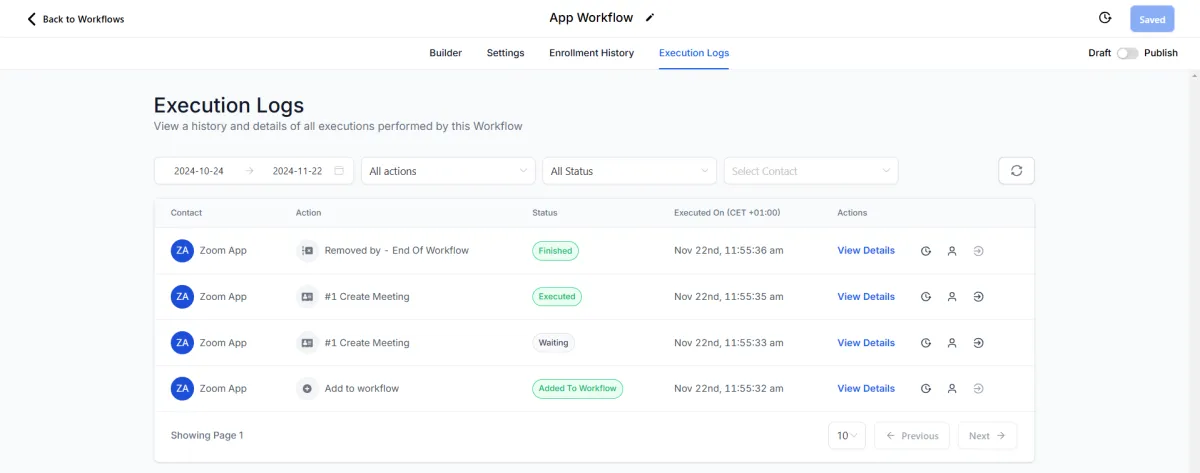
Execution Logs
After select the contact for workflow hit the save button on top right hand side. On the top nav-bar their is 4 button Builder, Settings, Enrollment History and Execution Logs.
Click on the Execution Logs on top nav-bar. Here you can see that your app is enter in the workflow which you have made then the action will trigger which you have selected. Meeting is created meeting is Executed and then the workflow is end as you can see in the image.
These are the actions now for the workflow. You can create unlimited Possibilities with this

Disconnect All The Apps from Zoom's Marketplace
Disconnecting All The Apps:
Log in to your Zoom account. Navigate to Zoom App Marketplace by going to Advanced > App Marketplace. On the navigation menu, click Added Apps under Personal App Management. Click Remove beside All The Apps.
Workflow Triggers Explained
Unlock the full potential of All The Apps by understanding our workflow triggers. This section provides in-depth explanations of how to set up, customize, and manage triggers, allowing you to automate tasks and enhance productivity seamlessly.